 |


OFF THE EDGE SAILPLANES
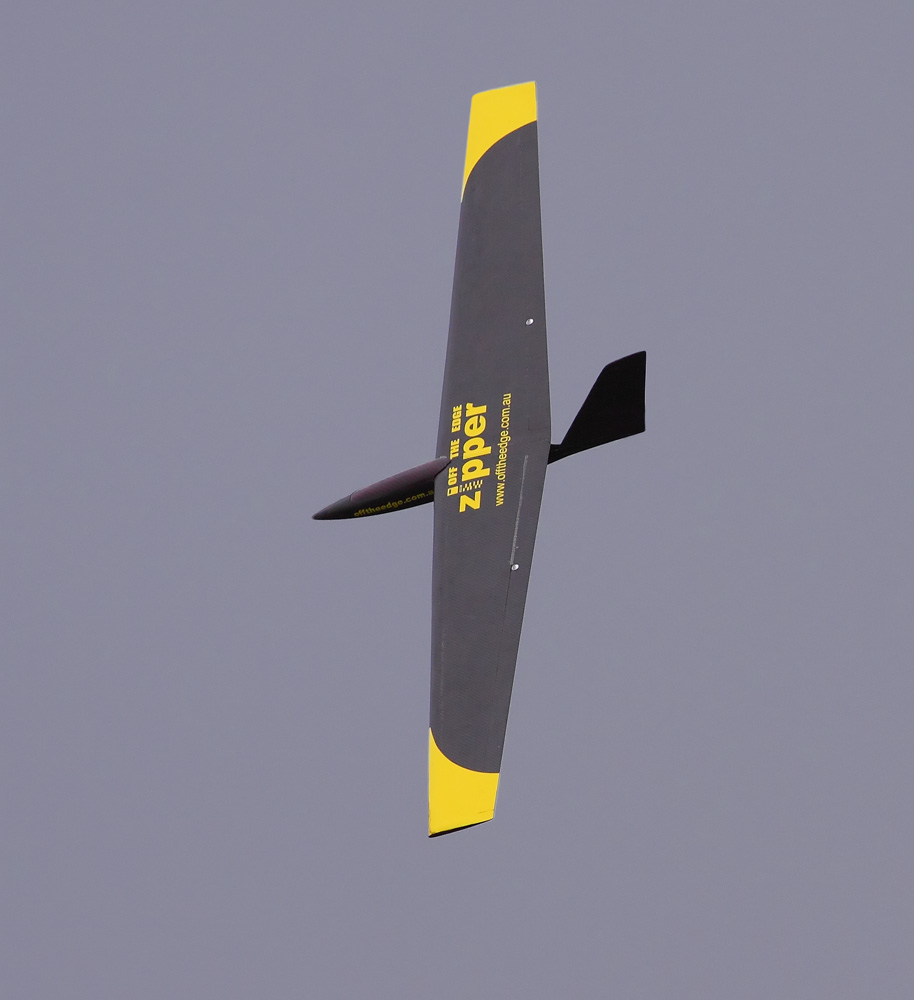
ZIPPER
www.offtheedge.com.au
The Wing
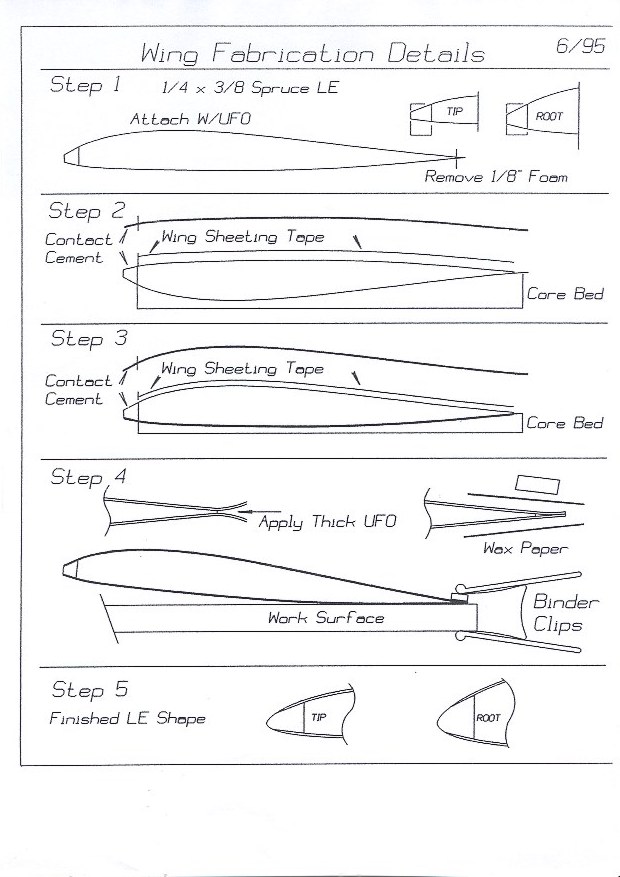
Step 1. Take your time with this step
Remove the wing cores from the wing beds. Cut the wing beds at the leading edge so you have a bottom wing bed and a top wing bed.
Remove all the fuzz from the wing cores and core beds.
Lightly sand the wing cores with 320 grit sand paper.
Cut ¼” off the leading edge of the wing cores
Glue the spruce leading edges (1/4” x 3/8” x 24’) to the wing cores with epoxy.
Shape the leading edge spruce to the shape shown in the diagram.
Remove 1/8” of foam from the trailing edge of the wing cores using a sharp razor blade and a straight edge.
If you should gouge the foam or alter the foam shape, use micro filler (micro balloons and white PVA glue) to repair.
Step 2.
Trim the 1/64” ply wing skins using the core beds as a template and adding1/8” to the root end and 1/8” to the trailing edge. Cut all 4 skins with the wood grain running parallel to the leading edges. Look at the layout on the bottom of the templates page. Sand the surfaces to be bonded with 320 grit sand paper and wipe with a paper towel.
Apply epoxy to the wing skins and tape them tightly into position at the leading edge. Press the leading edge down first and then press the skin down working toward the trailing edge
Place the cores into the core beds and carefully align the wing skin. Now place the wings in the core beds on a flat surface and with another flat board on top. Apply approximately 100 pounds onto top board and let set overnight.
Step 3. TAKE YOUR TIME
Using sand paper on a block, shape the leading edges as shown, 180 the 320 grit sandpaper work fine.
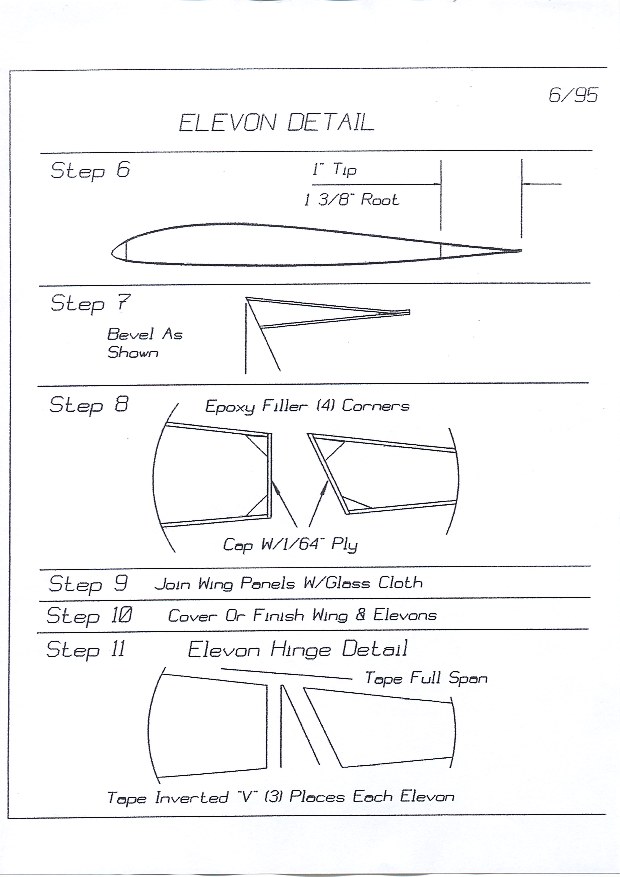
Step 4.
Mark 1” from the trailing edge at the tip and 1 3/8” at the root and draw a line with a straight edge between the two marks. Place each wing in there bottom core beds. Use a razor saw to cut the elevons and core beds. Block sand the back edge of the wing in its core bed. Check for straightness along the top edge.
Step 5.
Sand to the bevel shown using an angled wood block with sandpaper attached by double back tape. Start with 80grit and finish with 120 grit. Check for straightness along the top edge. Sand each elevon in its core bed.
Step 6.
Using a soldering iron, carefully melt the foam back as shown. Trim the 1/64” cap strips approximately 1/8” oversize and sand with 320 grit sandpaper. Thicken the epoxy and install the cap strips in place filling the melted back area. Masking tape may be used to hold the cap strips in place. The elevons should be placed on a flat surface upside down with the cap strips hanging over the edge to cure.
Step 7.
Epoxy the wing centers together upside down in there core beds on a flat surface and let cure. Sand the top and bottom of the wings. Use 6oz – 10oz fiberglass cloth and epoxy to reinforce the center section 1” wide for the top and 2 ½” fro the bottom. Install the wing tips with epoxy. I recommend melting back the foam on the ends of the wings as in step 6. shape as required
Step 8.
I use ULTRA COTE PLUS for covering the wings. Use what you like as long as it is low temp. The wings and elevons may alternately be painted.
Step 9.
Hinge with what you normally use. I like to use ½” clear hinge tape. Place the elevon upside down on top of the wing with the hinged points parallel. Apply the tap to both the wing and the elevon in one length. Hinge the elevon into the down position and apply the tape to the top while applying forward pressure to the elevon to reduce the gap.
Install the control horns with 3/8” between the horns
Summery
The wings may also be vacuum bagged or pressed.
Take your time; building it carefully will pay off!
THE FUSELAGE
Sand the outside completely with 320grit and 180grit and inside where the parts are to be glued. Epoxy the front and rear wing mounts as shown on the first page. Align the wing, mark and drill the 1/8” hole in the front of the wing.
Install a 18” dowel in the wing mount and slip the wing in place. Align the fuse and drill the hole in the rear of the wing and wing mount. Use a ¼” blind nut under the rear wing mount and a nylon bolt to hold the wing in place.
Trial fit the canopy and rim fit as required. Prime with a lacquer primer the putty and sand. Repeat as required. Prime then sand with 400grit when all pinholes are gone. Now finish with what you like. Glue the rudder to the 3/16” spruce and sand to shape. Finish the rudder off buy painting or film, leaving the bottom side’s epoxy. Install the rudder with epoxy aligning it with the wing in place. Use binder clips on the fuse sides to hold alignment.
RADIO INSTALLATION
Mark out and cut the servo holes into the servo tray, mini size servo’s like Hytec HS81MG”s will fit best. Test fit the tray with the servo’s in place making sure that the control rods move freely through the front bulkhead. Glue in place with thickened epoxy. Insert the battery pack and receiver using a foam block. The foam block should be large enough to push everything against the servo tray and bulge up out of the canopy area, this will hold the canopy in place.
Balance
Build a balance stand for this step.
Make it balance at 38mm to 40mm from the root leading edge. The fuse bottom should be level when balanced. You may play with the CG later if you like. (1mm increments)
First Flight
Set your elevator throw at 1/8” up and ¼” down, and the aileron throws at ¼” up and ¼” down.
Leave the ballast out and go easy on the sticks.
Use the elevator rim tab to set your speed for various conditions. A 10 to 15 mile per hour wind is perfect for your first flight.
We hope you enjoy flying the Zipper as much as we do.