 |


Off the edge sailplanes
zEPPer
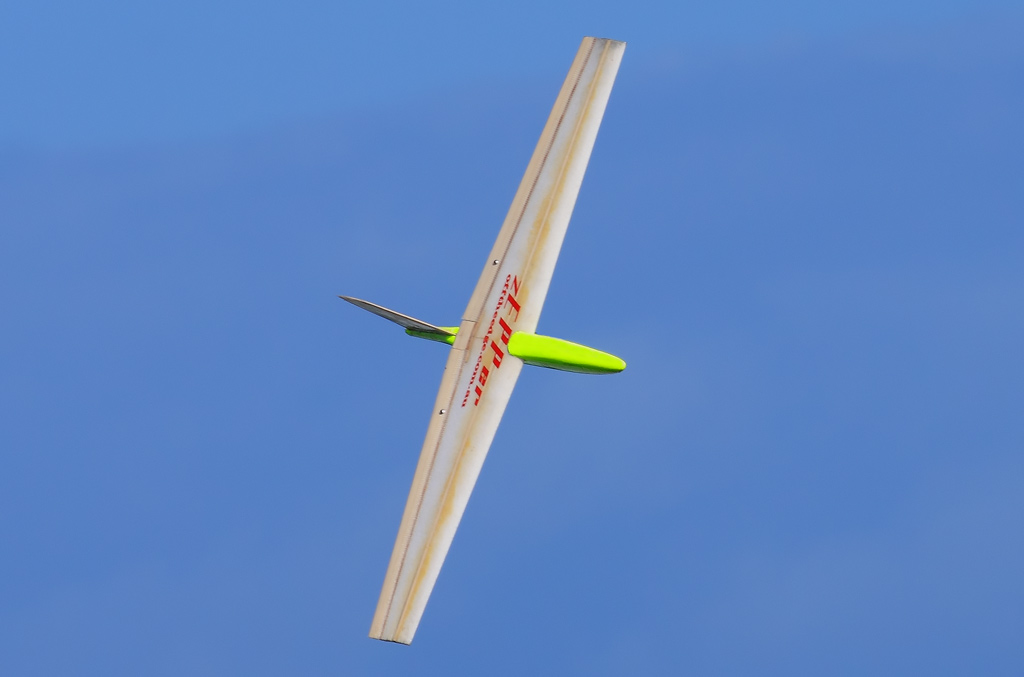
The zEPPer is a 48”, light weight EPP version of the famous Zipper slope glider. Designed for light to medium lift & most flying spaces, it is fast and agile and would suit most pilot skills
KIT CONTENTS
1. SET COMPUTER CUT EPP FOAM WING CORES (1.9ft/cu foot)
2. 78mm x 5mm x 1mm CARBON SPARS
1. 10mm CARBON LONGERON
1. COMPUTER CUT FUSALAGE POD
1. SET 5MM BALSA ELEVONS
2. SET OF CONTROL HORNS & PUSHRODS
1. BALSA TAIL
REQUIRED ITEMS (Not included in kit)
Radio Gear Accessories Needed
· Radio with elevon mixing & throw adjustment of 20% on the elevator
· 2 x Micro servos
· 1 x Micro receiver
· 4 x AAA rechargeable batteries, it is not necessary to use a switch just
plug it into the receiver
·
Building Supplies
· 3m-77 contact spray
. 5 min. epoxy
· Thin CA glue (cyanoacrylate) or known as super glue
· Hot melt glue gun
· Sharp hobby knife, razor blades, & scissors
· 50mm packing tape (Clear or colored) or low temperature iron on film covering
· Ruler
· Flexible plastic squeegee or stiff card for applying tape
· Sanding block & paper in 100 & 150 grit
Building Instructions
Preparing the wing
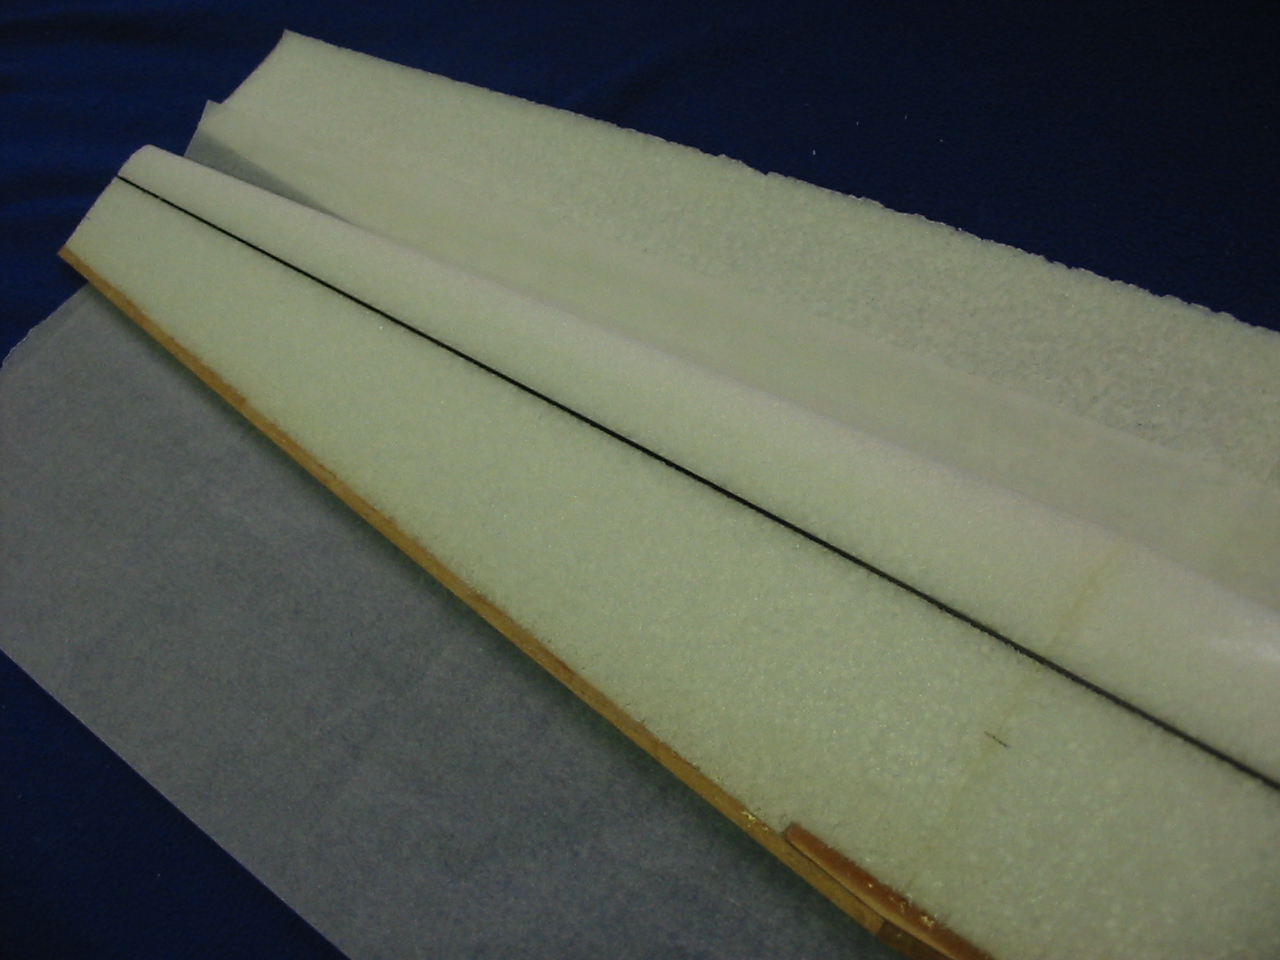
Remove wings from beds. Glue the two wing half together with 5 min. epoxy and let dry in there wing beds.
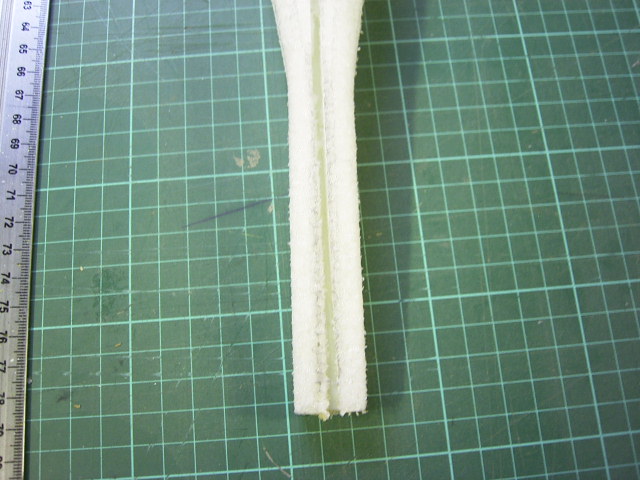
When the epoxy has dried, the 2 carbon spars can be glued in there spar grooves with a liberal amount of CA, making sure that the spares are flush with the surface on the wing
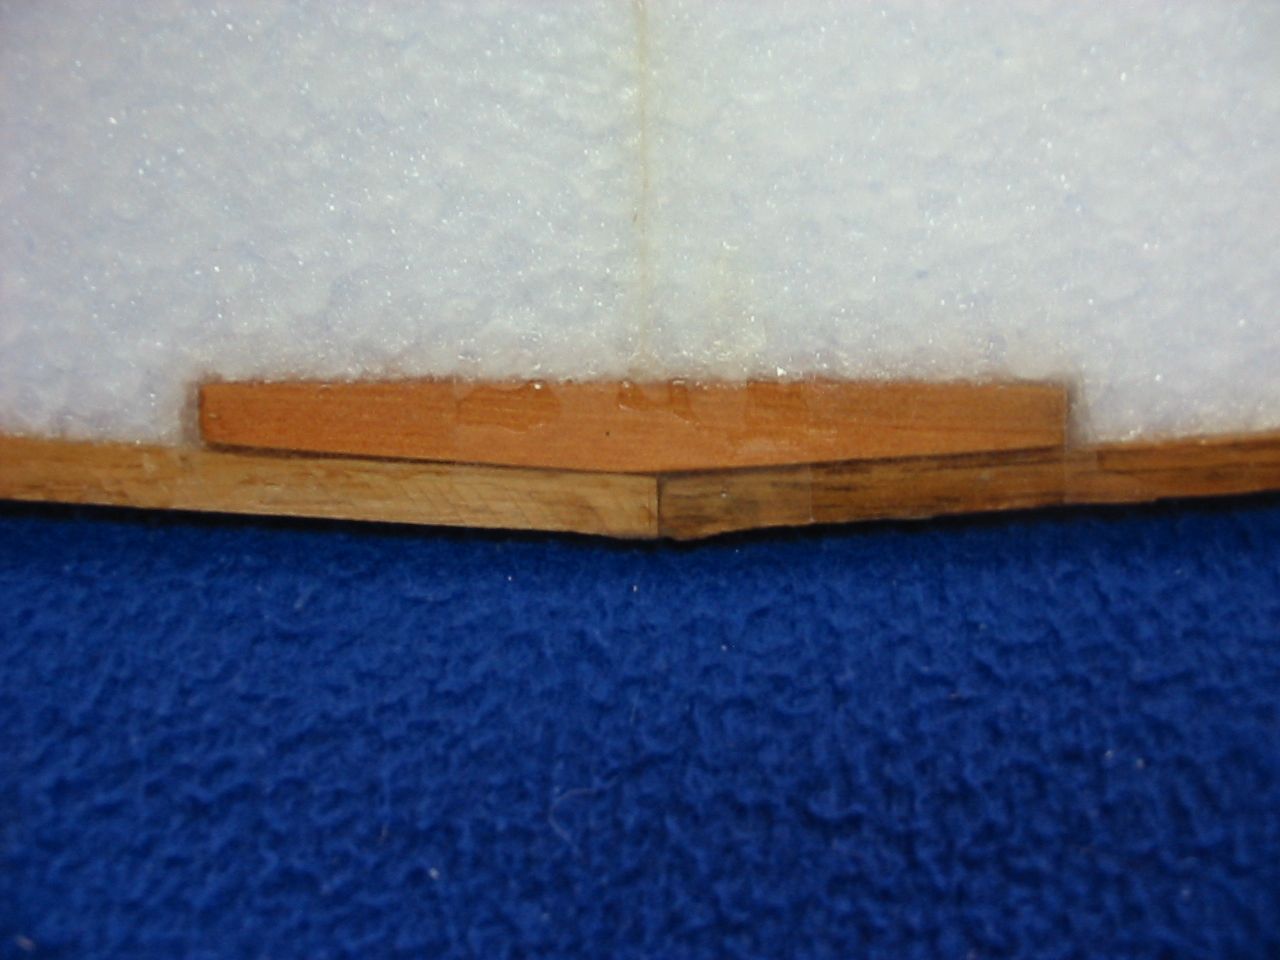
Now the hardwood sub spars can be glued on to the trailing edge of the wing with 5 min. epoxy.
The rear hardwood wing joiner can now be shaped to the angle of the trailing edge (as shown), a section of foam will need to cut out so that the wing joiner fits snug in the hole, now glue into position with 5 min. epoxy.
You now need to cut 30mm of the root end of each elevon (the fat end) and glue them to the trailing edge at the root as shown and sand to shape.
When dry the wing joiner and sub spar can be sanded flush with the surface of the foam.
Cutting the servo holes.
1. The servos are placed on the bottom of the wings, these need to be outside of the pod area by approx 60mm & as far forward as you can get them, even touching the carbon spar is fine, but remembering that the lead needs to be long enough to plug in to the receiver in the pod compartment so servo extensions may be needed.
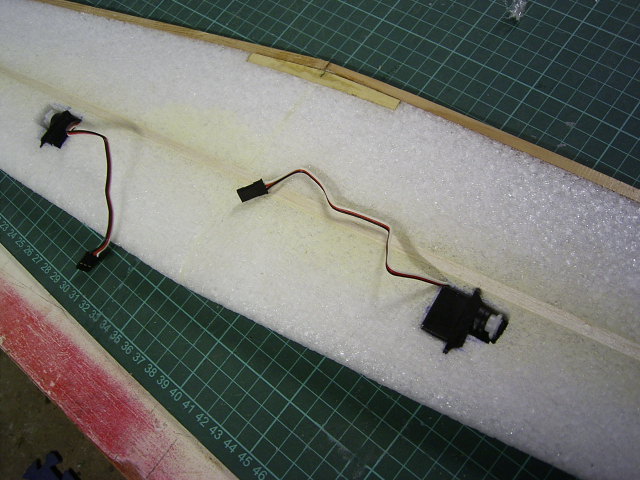
2. Place your servos on the wings & mark around the servo making sure you have the horn side pointing to the wing tip, using a sharp hobby knife cut the foam slightly smaller than the servo as you want the foam to hold the servo in place with a press fit, try to get the servo flush with the top of the wing surface, its ok to cut right through the wing & then slice the block that you cut out to make a cover for the bottom of the servo.
3. Connect up your receiver, battery and servos to centre the servos and check that they are operating the correct way. The servos can now be fitted into the servo holes and a 3mm deep slot can be made from the servo to an exit hole through the wing at the leading edge of the root above were the receiver will be located, for the servo leads to be pushed into.
4. You will have to make the battery pack in a 2 on 2 fashion.
Preparing the pod
The first part of preparing the pod is to remove the foam block from the front of the pod (do not throw it away you will need it). Now fit the three peaces of 20mm wide ply in the centre of the receiver/battery compartment, the long peace is glued (5 min. epoxy) inside the top of the compartment and the two smaller peaces go at each end.
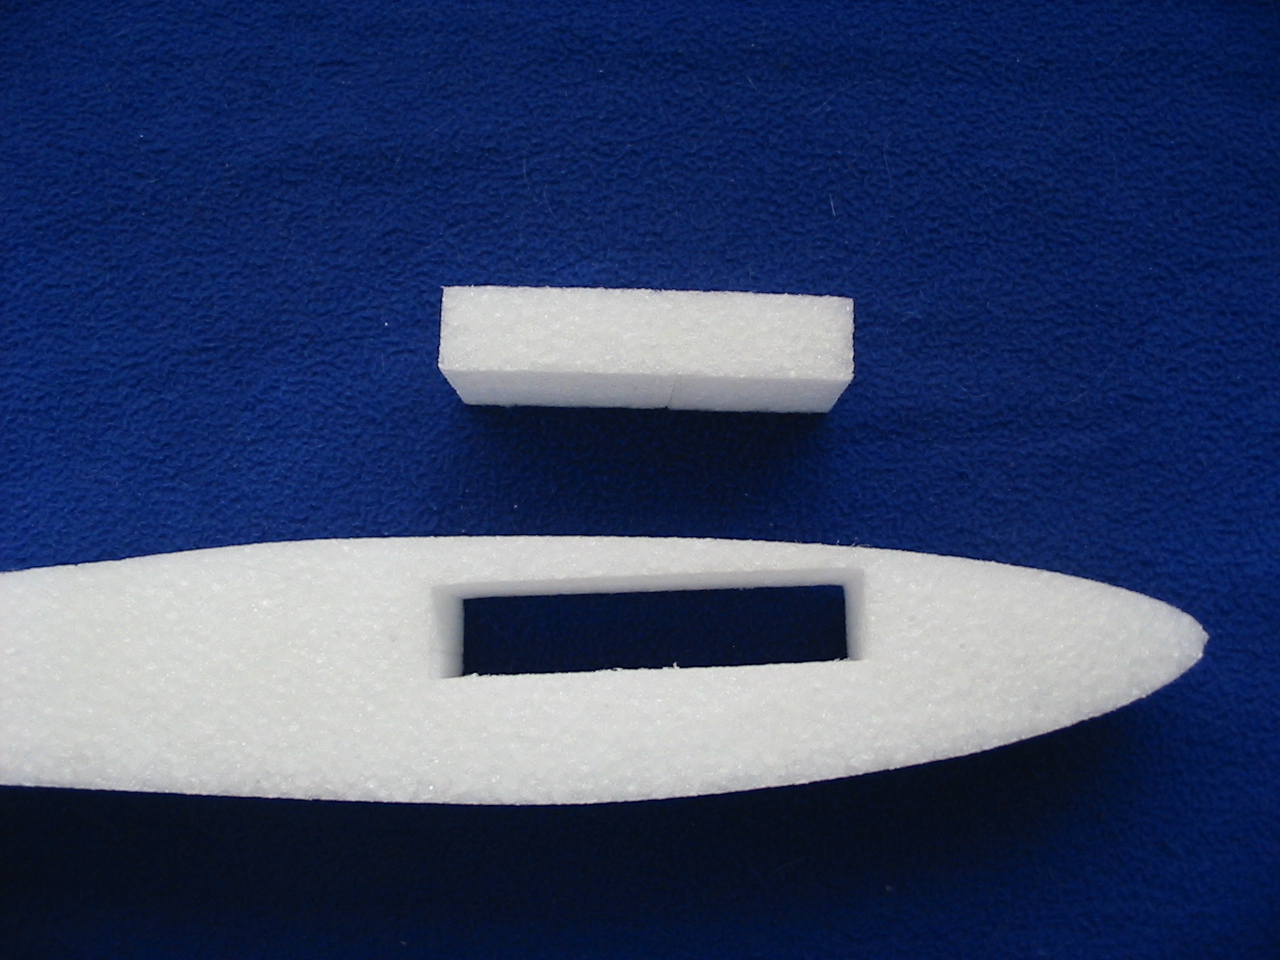

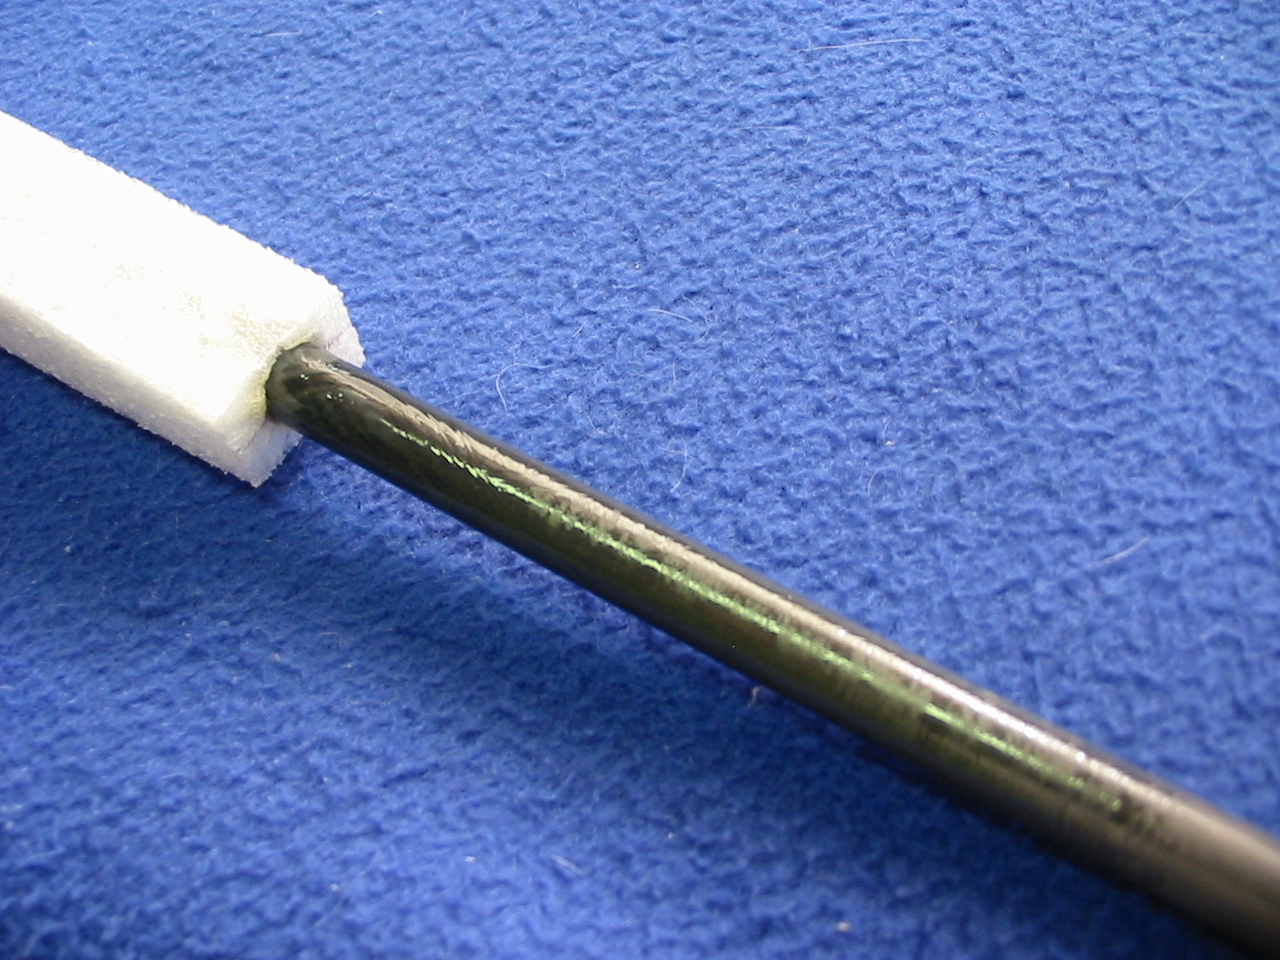
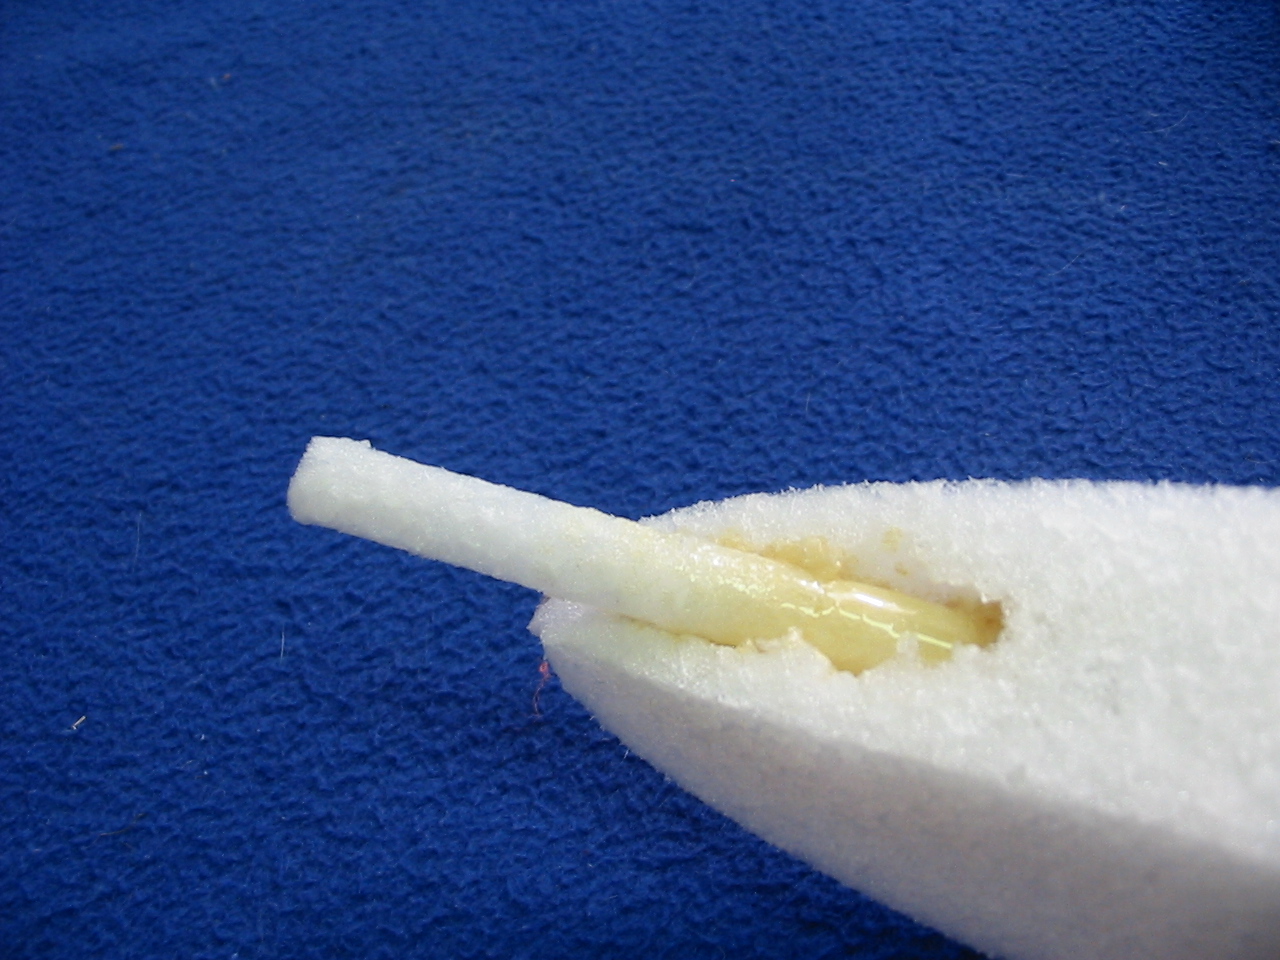
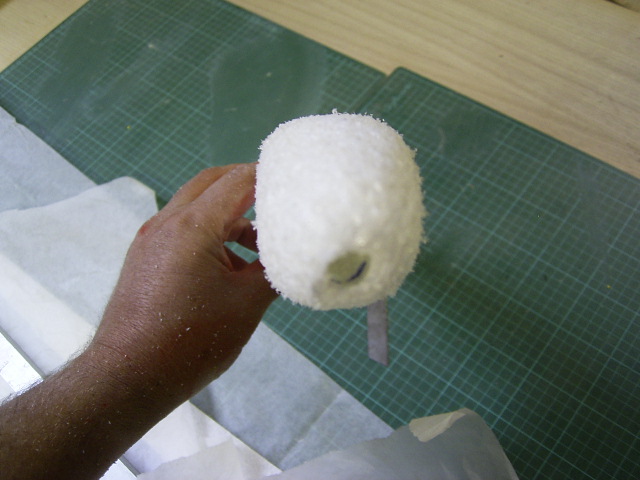
Next the fiberglass longeron is glued into the pod (with PU (polyurethane)) making sure that the end is flush with the rear of the pod and cap the nose of the pod with the foam noodle provided. When it is dry the noodle can be trimmed flush with the pod.
The foam block that was removed from the pod can now be cut in half length ways. One of the half’s gets glued into the pod, so that it is sitting against the ply box the other is cut in half as shown and the front half is glued into position against the ply box, making sure that the battery will fit in between the foam in the boxed area, it might be a good idea to leave the battery in while you glue the foam into position. When the glue has dried the remaining peaces of foam can be pushed into position BUT not glued, it will become your access hatch to the receiver.
Now the excess foam can be trimmed off the battery/receiver box with a sharp knife. With some 80 grit sandpaper sand the pod round and sand the battery/receiver box flush, then finish off with 150 grit sandpaper.
You can now cover the pod with either packing tape or heat shrink film; I have found that Solar- tex is the best for the pod as it will conform to the round shape the best. Give the pod a light spray with 3M-77 spray glue before covering & cover the pod in fiber strapping tape to reinforce the pod, then cover with tape or film.
Covering wings –Packing tape method (recommended)
1. To cover the wings we recommend using fiber packing tape underneath a light weight colored packing tape or a good quality iron on film with a uv- resistant adhesive.
2. First you must clean the wings with a vacuum or blow them off with compressed air then give them a medium coating off 3m 77 spray glue on both sides & let dry till it is just tacky but does not transfer to your finger when touched. This usually takes five to ten minutes at room temperature.
3. Place some oven-bake paper down in the wing beds & place the wing on top of the bed on your work surface. Cover the bottom of wing first with fiber tape & start taping at the trailing edge, working forward then repeat on the top side of the wing. When the fiber tape is completed it will need to be lightly sanded with 150 grit sandpaper to remove and release agent on the tape, after vacuuming again spray with 3M77.
4. Now the colored tape can be applied by overlapping the tape by approximately 5mm. The first strip is placed overhanging the trailing edge by 15mm .The tape is gently placed over the wing and is smoothed down with the flexible plastic squeegee. The trailing edge is folded over onto the top surface. The tape overhanging the tips can be trimmed to approximately 10mm and folded over onto the top surface. You will have to pick up the wing when folding these overlaps onto the bottom surface. Take care not to cut into the foam while trimming the tape.
5. When you reach the leading edge, trim overhanging tape so that it is parallel to the leading edge & overhangs by approximately 10mm, fold this overhang around the leading edge & onto the top surface of the wing using the squeegee & light pressure.
6. To cover the top of the wings, place the covered wings in the bottom bed half’s & cover in the same sequence as the top of the wing
Iron on film (advanced)
1. You can use a low temp iron on film (pro-film) if you prefer, you have to be very careful & use a low temp iron (hobby type) so you don’t distort the wing as you heat the film to shrink it!
2. The method I use is to cover the bottom of the wing in one peace, and then cover the top also in one peace, this method gives you a very strong & clean build. Use the 3m77 spray glue, 2x light coats are better than 1 heavy coat, let the glue get very tacky before spraying the 2nd coat on & covering one side, then repeat for the 2nd side.
Covering & fitting the control surfaces (elevons)
The elevons will need to be shaped before covering as shown, a 45° angle will also need to sanded into the front of the elevon for hinging purposes.
Check & wipe the elevons & cover top first with fiber tape after spraying with 3M77 and repeat on the bottom. Tape or film can now be applied to the elevons.
Attach the elevons to the wing using a top & bottom tape hinge. The elevons are mounted to the wing with the thin end at the tip and the fat end at the root. Apply the bottom tape hinge first then fit it to the wing while holding it at a 45 degrees angle up, smooth the tape down, flip the elevon on to the bottom surface & hold in position with some masking tape & apply the top hinge tape & smooth using a cloth.
Check that the elevons are free to move.
Fit out
Install the receiver into the compartment & connect up the servos & battery to re-centre the servos, measure the distance between the servo horns & mark this distance on the elevons for the placement of the control horns. The holes in the control horn must be inline with the hinge line. Drill the holes in the elevons and mount the control horns.
Fit the control rod with a Z bend into the servo and the other end with the quick-link to the control horn. Set the elevon neutral position with a ruler on the bottom of the wing, the elevon should have a slight up position. Set the elevator travel to about 3mm up and 3mm down & the aileron to 15mm up and 10mm down for a start, this will do till you become familiar with the plane, after that you can increase them to suit your flying stile. ThezEPPeris a pitch sensitive glider, so if you use a 2 channel radio with out end point adjustments it will be very difficult to control as the elevator travel will be too much.
Attaching the wing to the fuse
The wing is attached to the fuse pod with hot glue from a hot glue gun. Mark the center of the wing at the root and also mark the center of the fuse at the wing saddle. Feed the servo wires through the fuse into the reviver compartment and make sure the wing sits flush in the wing saddle. Apply a liberal amount of hot glue to the wing saddle and push the wing into the glue while it is still hot, you have a little time to square the wing up before the glue setts.
We use hot glue to mount the wing to the fuse pod as it has some give when you have a sudden arrival which will allow the wing to detach from the fuse without causing to much damage.
Fitting the tail
The tail will need to be sanded to make it more aerodynamic, sand it round at the leading edge and sharp at the trailing edge. Cover the tail with tape or iron on film.
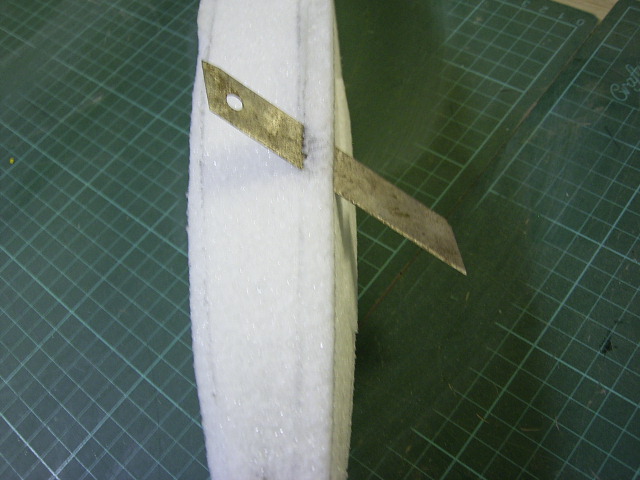
To fit the tail, a groove needs to be cut in the foam at the rear of the pod, down to the carbon longeron. Make sure that the groove is straight along the length of the pod.
The tail can be glued into position or potted.
By potting the tail, it will allow the tail to fall out if knocked. To pot the tail you will need to cover the tail in cling rap, partly fill groove with 5 min epoxy and then insert the tail into the groove until the epoxy has set, then remove the tail and cling rap, your tail can then be put back into the groove with a press fit.
The centre of gravity, or cg is located 40mm form the leading edge at the centre of the wing, use a pen to mark it on both sides of the pod.
You can balance it on your finger tips, but it is better to use a pair of pointed dowels or pencil as balance points, some nose weight will be required to balance the glider. The zEPPer should balance level when viewed from the side. Do not deviate from the recommended CG by more than 2mm. When fitting the noise weight cut a small hole in the underside of the pod & insert the lead then cover the hole.
Test flying
The zEPPer must be balanced and trimmed properly in order for it to fly smoothly and efficiently. It may take several flights before you get the balance right. Flying wings usually requires a bit of “fine –tuning” in order to get them flying properly.
It is recommended that you test fly the zEPPer on a flat grassy area before you commit yourself on a slope. Always check your radio for proper operation before flying. For the test flight you should use low rates, Give the zEPPer a solid, level throw into the wind. Make any trim adjustments.
Adjust the trim switches on your radio until the zEPPer flies straight and level. If the zEPPer behaves unusually in pitch, then the balance is most likely incorrect. Proper balance is extremely important on flying wings. A useful method for checking the balance of your zEPPer is the dive test: gain some altitude and enter a fairly steep dive and cease control input for a couple of seconds. If the zEPPer quickly pulls out of the dive on its own, it is most likely nose heavy – so remove a small amount of nose weight and add a click or two of down trim. If the aircraft goes into a steeper dive and feels extremely sensitive in pitch, it is tail heavy – add a little nose weight and a click or two of up trim. The zEPPer should follow straight through in a dive for maximum performance – i.e. it should not nose up or down sharply when in a dive. A properly balanced zEPPer requires very little down elevator for inverted flight (remember, a glider should be flown fast during inverted flight).
Now you are ready for the slopes. Good luck and have fun!